DCP-o-matic includes a DCP player, and although it requires a very high-speed CPU to play DCPs in full resolution, it can also play DCPs at reduced resolutions with slower CPUs.
To use the player, start DCP-o-matic Player, and load a DCP using the Open option on the File menu.
If you load a VF and/or encrypted DCP you can add your OV and/or KDM using the appropriate options on the File menu.
To play an encrypted DCP, the creator of the DCP will need to send you a KDM. For that, they will need a certificate which identifies your copy of DCP-o-matic. You can export the certificate by following the instructions given in ???.
During playback the Performance area at the bottom right of the window will give details of how many frames are being dropped; these are frames that were not decoded from the DCP quickly enough. If this number is high you can increase performance at the cost of rendering quality by choosing an option from the View menu. If you set the player to decode at less than full resolution the DCP's data will be decoded at this lower resolution, which is quicker than decoding at full resolution.
Another way to improve performance is to set the Video display mode in Preferences to OpenGL (faster). This should provide a significant speed-up on most systems, although this mode has not been so widely tested so may have problems.
By default, the DCP-o-matic player is set up to load and play back single DCPs, mostly for checking purposes. There is also a second, more experimental mode, which is more suited to using DCP-o-matic for ‘presentation’ applications, such as playing back DCPs via a projector. In this mode you can set up basic playlists, in a similar way to how most commercial playback servers work.
Using DCP-o-matic for theatrical exhibition is not widely tested, and I would not advise depending on it without plenty of testing in your particular environment.
The ‘advanced’ playback mode uses two windows (instead of the usual one):
- Full-screen playback window.
- Control window.
The idea is that these windows are spread over two monitors (or one monitor and one projector).
To enable ‘advanced’ mode, load the player and go to the preferences and open the General tab of preferences, then choose full screen with separate advanced controls from the Start player as drop-down list. Then close and re-start the player.
On loading the player in ‘advanced’ mode you will see a control window like the one in Figure 18.1, “Player in advanced mode”.
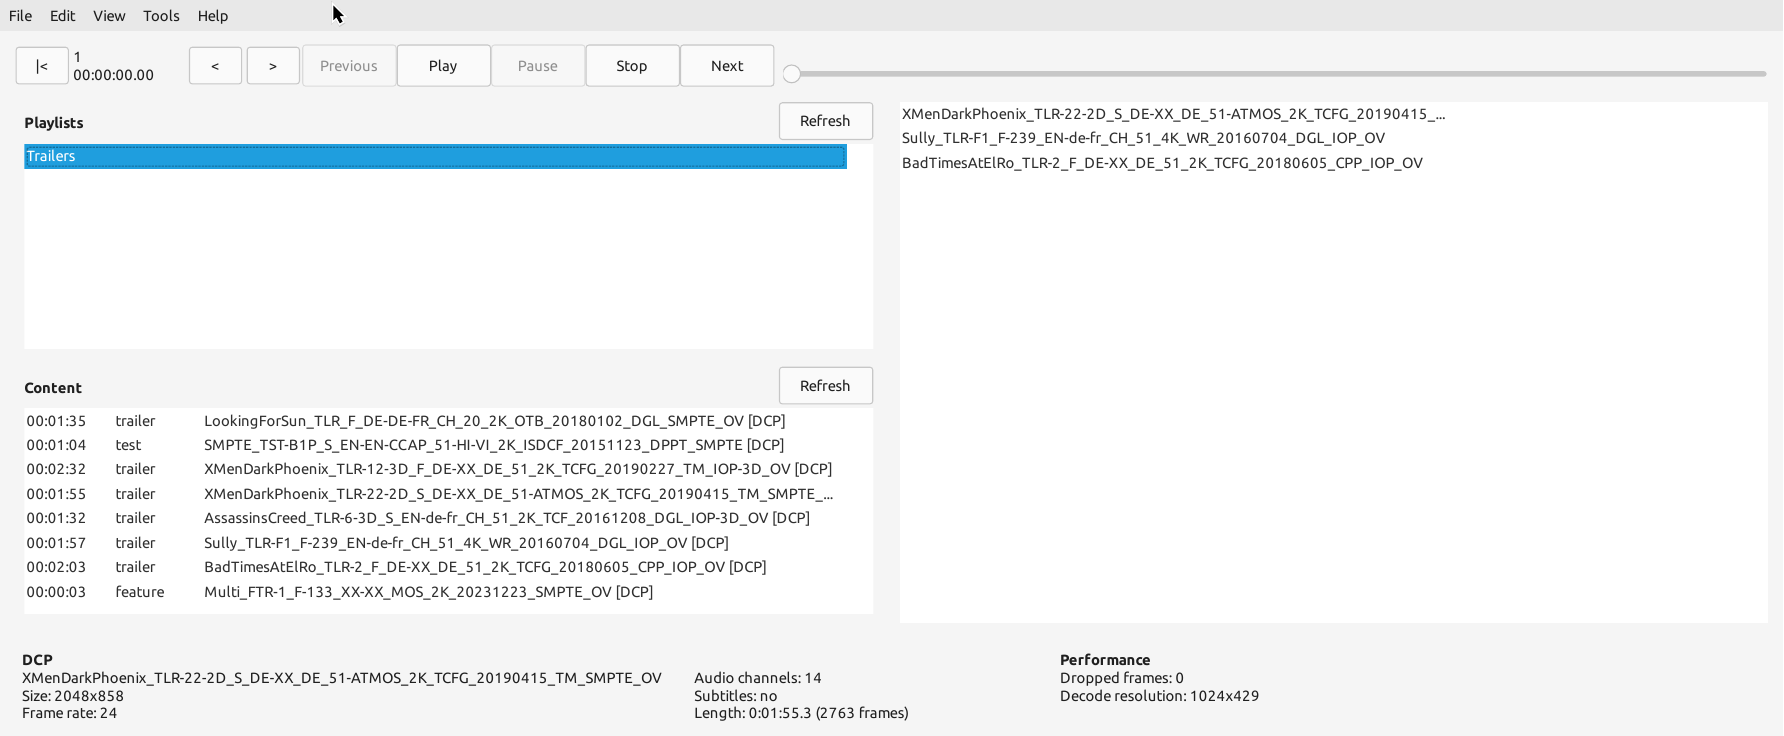
The important parts are the list of playlists, in the top left, and the current playlist, on the right. Double-click a playlist to load it, and then press the Play button to start playback.
Creating playlists must be done using the separate DCP-o-matic Playlist Editor. As with the other tools, this is included with the normal installer on Windows and most Linux distributions, but must be downloaded separately on macOS or if you are using AppImage.
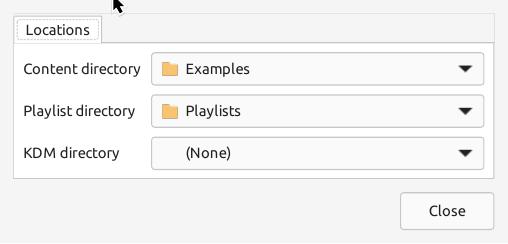
The first important step after loading the playlist editor for the first time is to set the location of your playlists, the content (i.e. DCPs) that they will use, and a folder containing any KDMs that the content needs. This can be done in the Playlist Editor preferences window, as shown in Figure 18.2, “Playlist editor preferences”.
Once you have done this you can start creating playlists in the main editor window. Each playlist you create will be shown in the player and so be available for playback. The playlist editor is shown in Figure 18.3, “Playlist editor”.
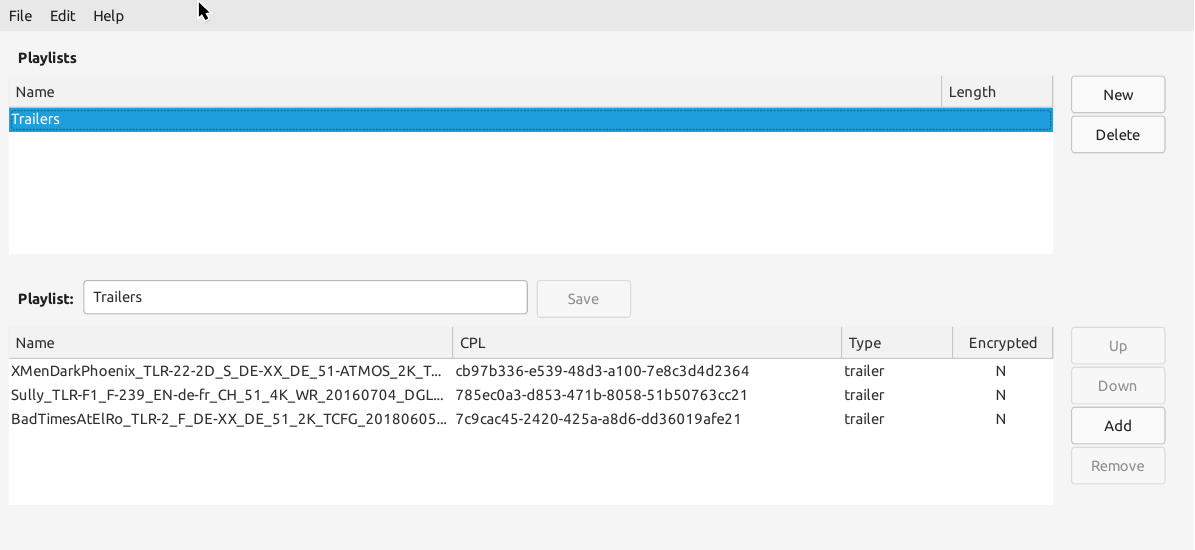
The top half of the window shows the current list of playlists. Create a new one by clicking the New button. You can then edit its name and add remove, or reorder content in the bottom half of the window. Playlists are saved automatically each time they are changed.